Submit Your App on Apple App Store – A Step By Step Guide
- Mobile
- October 26, 2016
Is your app quite ready to appear in the App Store but you don’t exactly know how to do that? We’re here to help you out, at least with the first few steps. We’re assuming here that you already have an Apple ID as well as a distribution certificate, and we’re starting from there. Let’s get started.
There are four steps you need to go through, so we have a lot of information to go through. Let’s get right into it.
Here’s the list with the four steps:
- Make up the distribution provisioning profile for your application
- Get an iOS certification
- Create and include all the data in your listing in iTunes Connect
- Lastly, you need to submit your work for certification (using Xcode)
1. Creating the distribution provisioning profile
If you’re reading this article, you already have made your development provisioning profile necessary for your app, so this process shouldn’t be that difficult.
There is a difference between the two that you should know from the beginning though: while the development provisioning profile allows you to include numerous development certificates, the distribution profile doesn’t work the same. In the first one, you are allowed to have more app developers working on the app, but the distribution certificate has to be unique, as well as the signing in information. When you generate the archive, you will need this distribution certificate to code sign your app among the thousands of apps in the App Store.
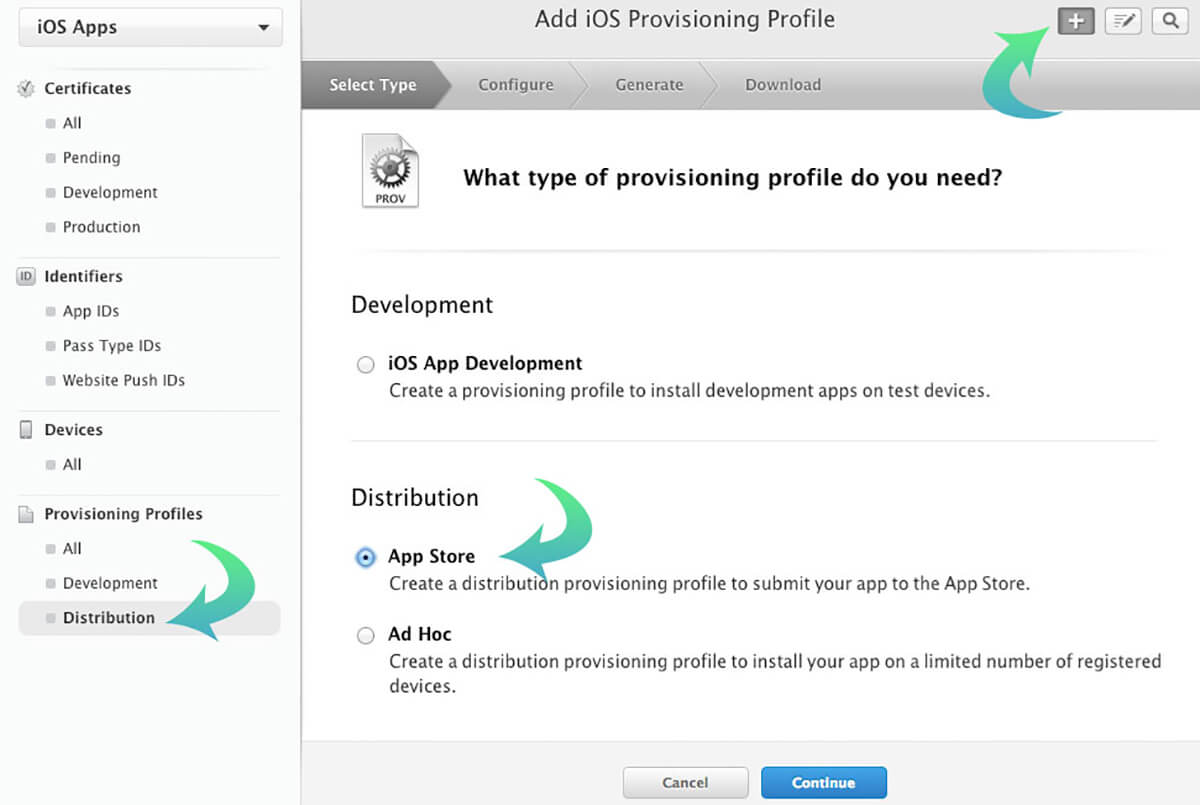
Now, let’s get right down to the steps you need to follow to get your distribution provisioning profile. Start by logging in into iOS’ Developer Provisioning Portal, where you’ve already created the provisioning profile for development. Go ahead and choose the Distribution Provisioning Profile section and tap on that plus button on the right side of the screen.
Here you will need to choose your option, which in the present scenario is “App Store” and click “Continue”. Go ahead and also select your application’s ID and choose “Continue”.
We hope you’ve already requested a distribution certificate, because this is the place where it would be available. If you did, just select that and press “Continue”. From here on out, we’re almost finished with this step. Click on “Generate” after you’ve given a name to your profile. After this, you can download and install the profile by double clicking on it.
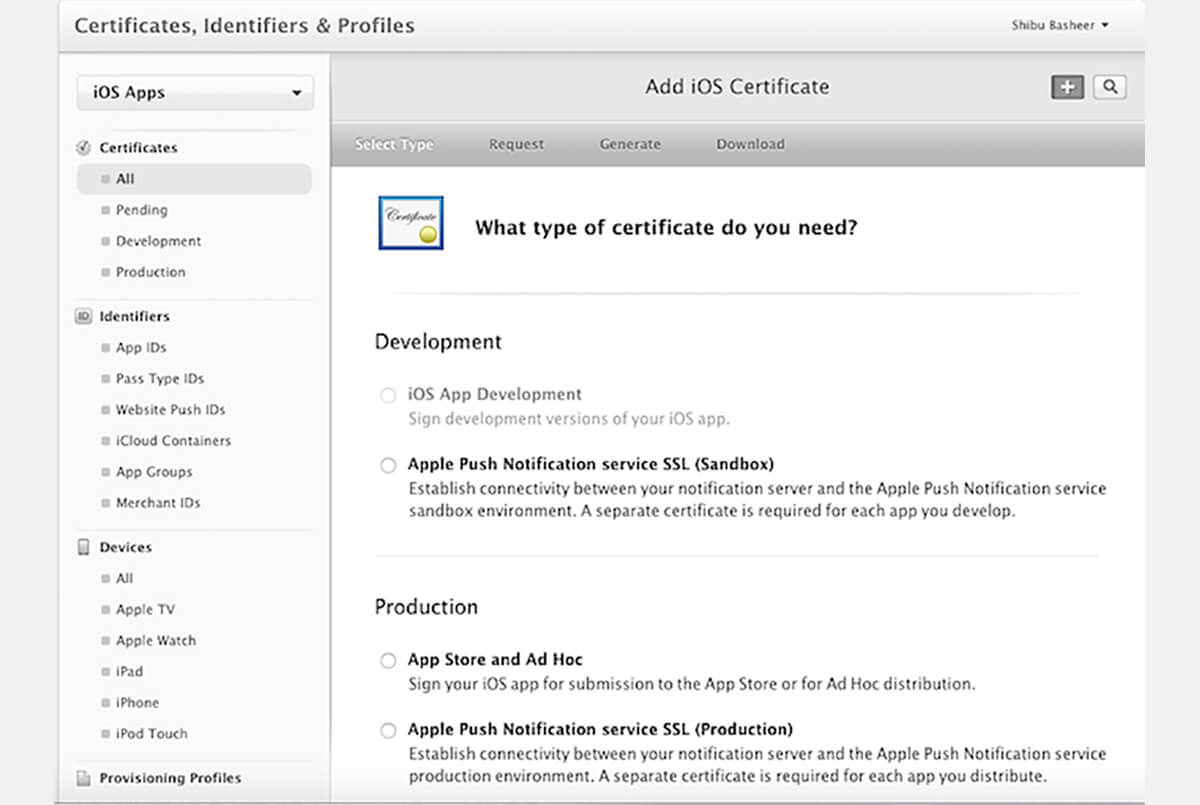
2. Receiving an iOS certification
The operating system has to clear your app for it go out in the App Store – they check for malicious programs, any rule breaking or other issues the app might have that the user wouldn’t enjoy very much. If you’re interested in the App Store’s guidelines for their review, you can easily find them on the internet, they are available for everyone to see.
After you’ve checked your app for any issues, you can go right ahead to select the root node in the file navigator. Click on the menu “Project Settings”, then on the submenu “Build Settings”. In this submenu you need to choose “Code Signing”, and after that, “iOS Distribution”. This feature connects you automatically with your Distribution Signing Identity. If by any chance, you have numerous of these identities, you should choose your desired identity specifically.
After you’ve done that, you can go right ahead to creating the Release build so you can send it to the App Store.
You need to select iOS Device for your deployment target. Going further, you need to select “Product menu item”, and afterwards, “Archive”.
After this, your app’s archive will be automatically created in Xcode Organizer. You will also be able to see any previous archives you’ve created in this section.
Switch to iTunes Connect and complete the App Store listing with all the info needed. Switch once again to the Xcode Organizer and you can alre ady submit the app.
3. Creating the app listing
The third step you need to go through is developing the listing for your app in iTunes Connect, a dashboard which will be very helpful to you from now on. You can do various actions in this program, from managing your contacts, to checking out performance reports of your app in the App Store.
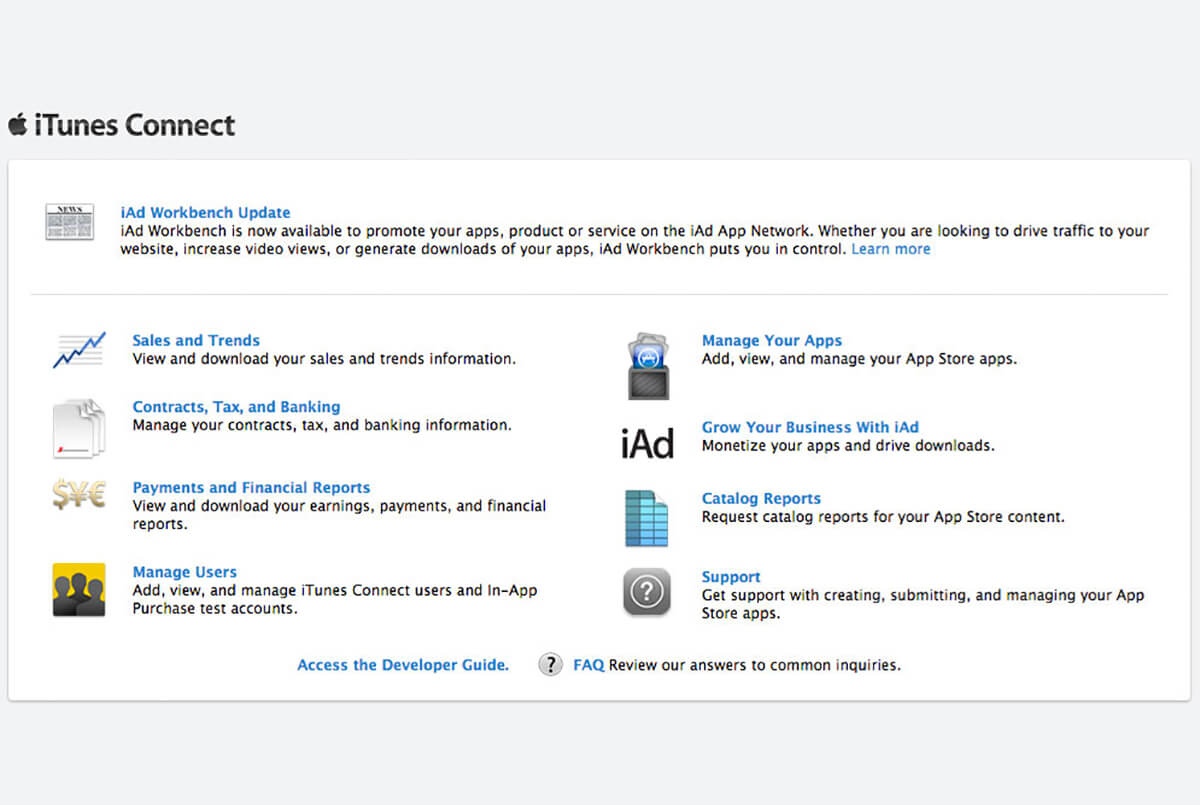
Start by selecting the button “Manage Your Apps”. After that you can go right ahead to click on “Add New App”. In this section, you will have to enter various data about your app from basic info to pricing and availability.
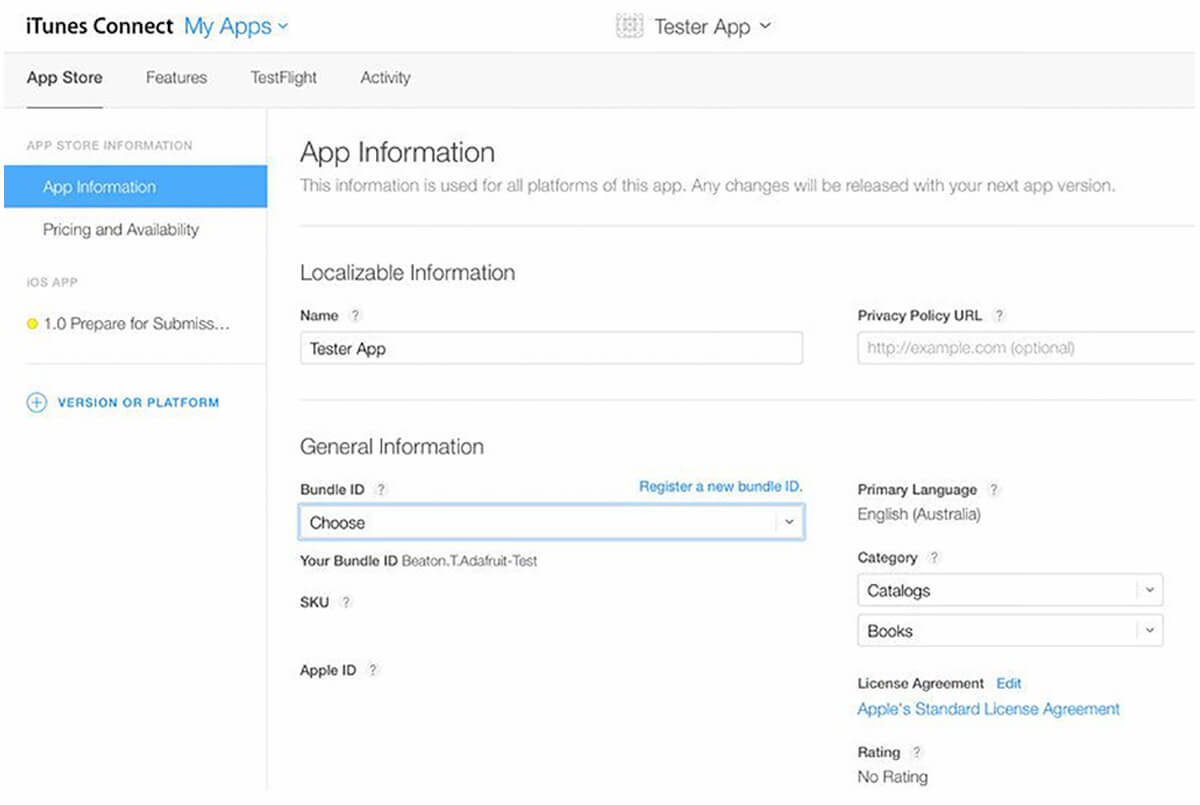
Let’s start out with app information. Press on the bundle ID you’ve created before, and write your app’s name. This will give you the SKU number of your app, which is basically a barcode for your ‘product’. It has no use for iTunes, just for you to identify your product by a unique string of characters. When you’re done with entering all the data necessary here, you just press on “Continue”.
Now you’re faced with your App’s Availability: here you need to decide when you want your app to be released into the App Store. You can set it for today, if you want it to go out as soon as possible. This way, after it goes through certification, the app will be released in a matter of 24 hours. If you set it later, but decide in the meantime that you’d want it released earlier, you can manually release it after certification with the help of iTunes Connect.
If you want to monetize your app by setting a price of installing, you will need to enter in the “Contracts, Tax and Banking” menu of iTunes Connect, a few pieces of information about your banking account, where all the money will go.
After this basic info, you also need to provide info about the app version, contact, art assents, metadata and EULA. With all of these, you should address your developer to help you out.
4. Submit your app via Xcode
We’re finally down to the forth step which is submitting your application by using Xcode. Enter Xcode, and select the “Organizer” menu. You can now access the “Archives” with all of your apps, and select the one you need for now. To make it go through validation, you just need to press “Distribute”.
Go ahead and sign in with your iTunes Connect account, so that the program can verify that you’ve created your app listing (step three). If the validation goes according to plan, your app will be in the “Waiting for Review” stage, as you will see if you open up once again iTunes Connect. From here on out, we just need to wish you good luck.
Conclusion
Creating an app is a very complicated process, but entering your app in either the Apple App Store or Google Play Store, shouldn’t be so difficult. We hope we’ve helped you out quite a bit with our article here.